Working with labels
Add labels to the feedback flow so your users can automatically categorize incoming feedback or add labels programmatically to better organize support requests.
Add labels to the feedback flow
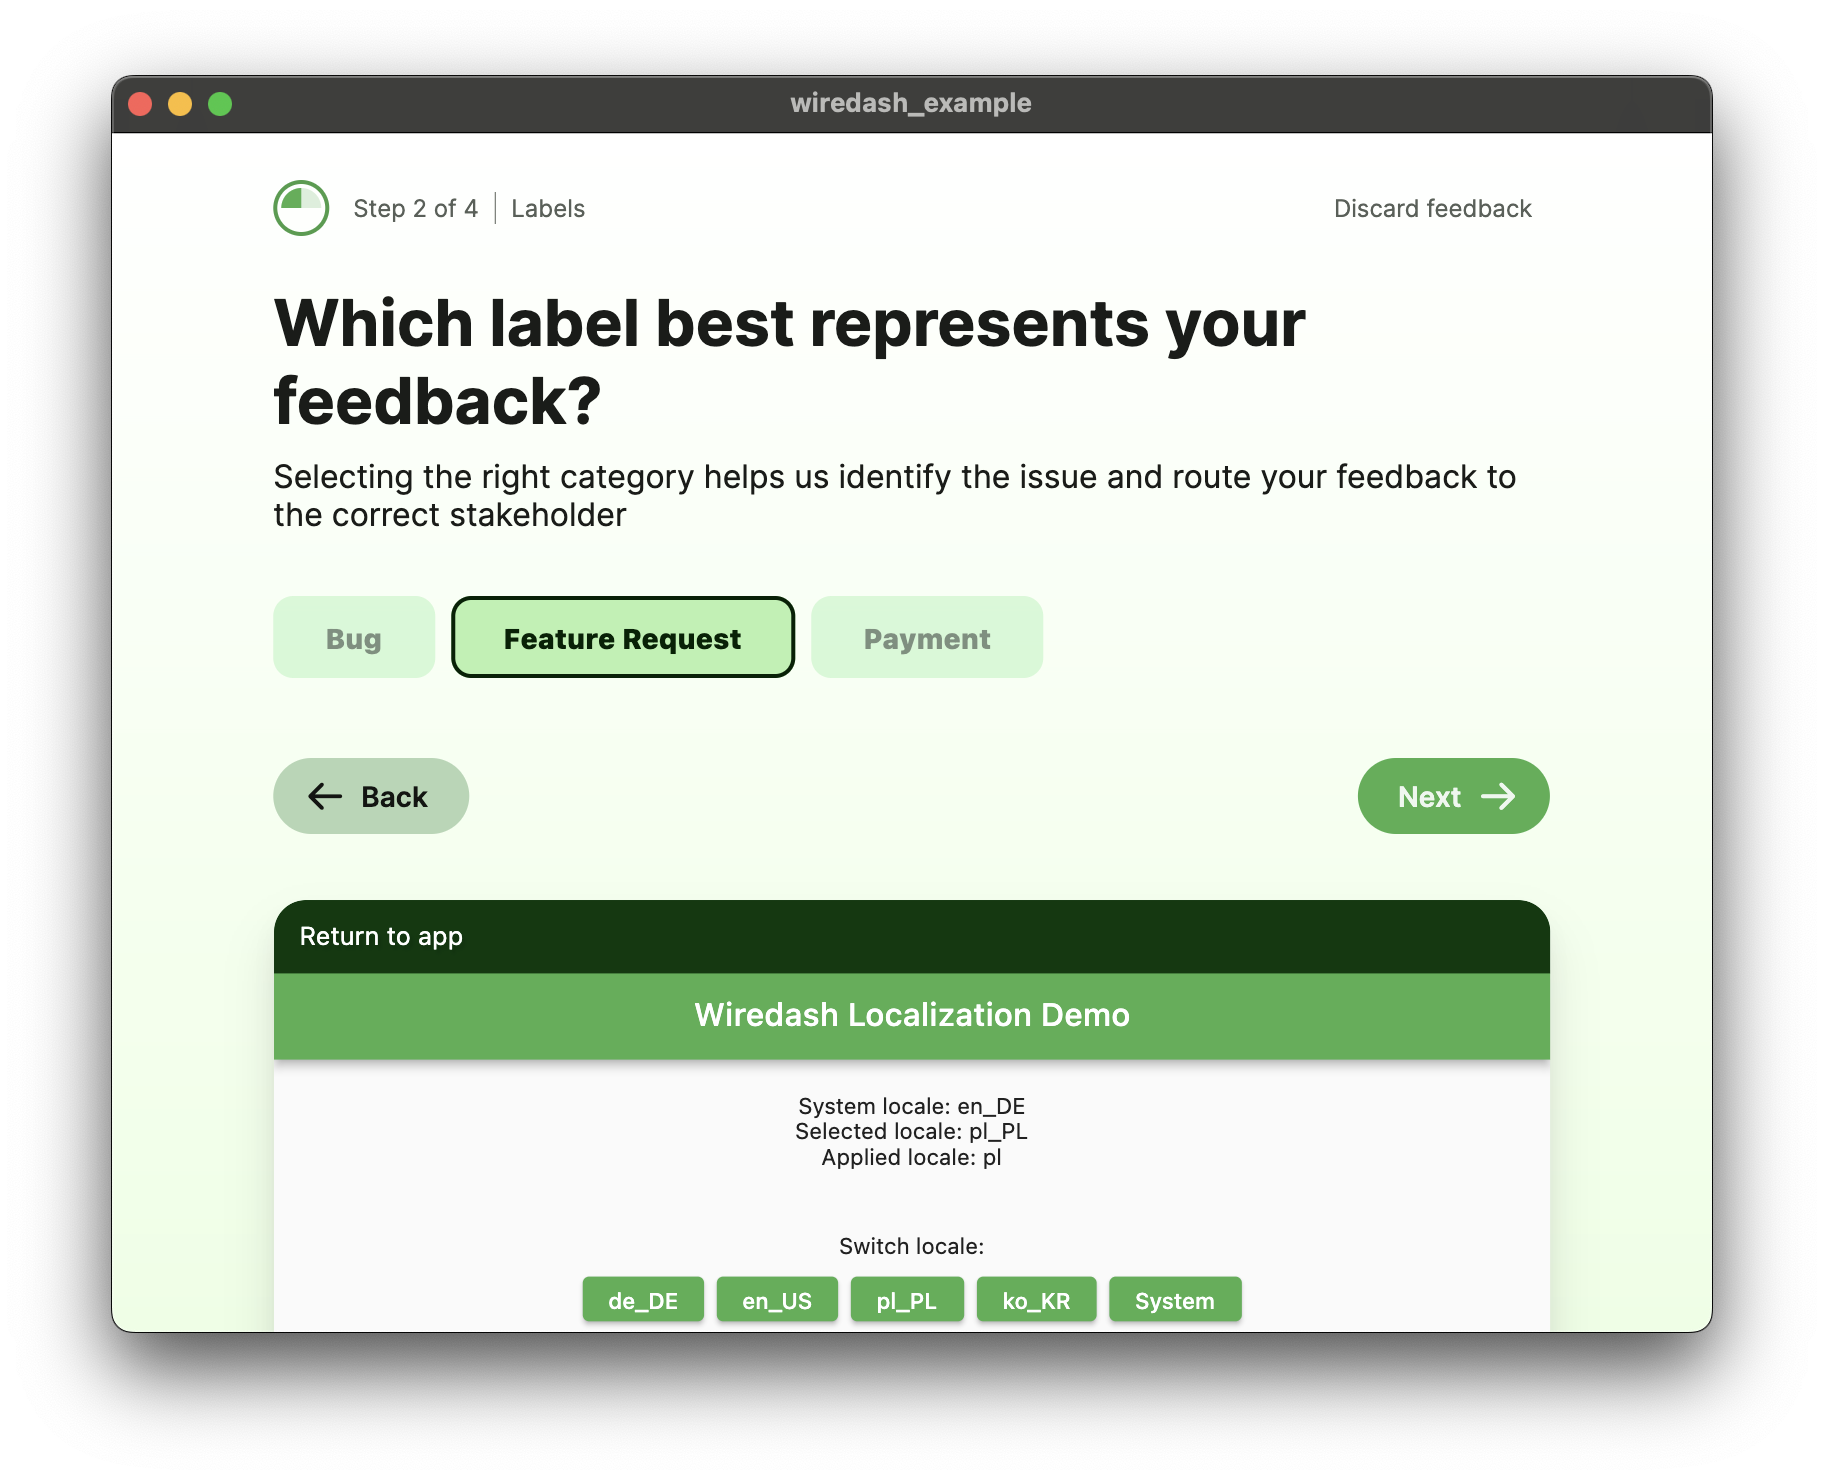
You can configure Wiredash to show an additional step in the feedback flow which asks the user to select what kind of feedback they’re giving. This is useful for pre-organizing the feedback or routing it differently through third-party integrations.
INFO
To add labels to your project, you need to have some created in your Console. By default, we create three labels for you: Bug, Improvement, and Praise. You can always create more or delete those you don’t use. Labels are a general concept in Wiredash and do not only apply to feedback but to every feature. That’s why you need to manually add them to your feedback configuration. This way, you can have internal and publicly used labels.
The label step is shown after the user enters their message. To show the user a selection of labels and categorize their request, you need to add the labels to the feedbackOptions. For this, you'll need the label ID, which you can obtain from the Console by clicking on the fingerprint icon next to it.
return Wiredash(
  // ...
  feedbackOptions: WiredashFeedbackOptions(
    labels: [
      // Grab the label IDs from the Console
      // https://wiredash.com/console -> Settings -> Labels
      Label(
        id: 'lbl-r65egsdf',
        title: 'Bug',
      ),
      Label(
        id: 'lbl-6543df23s',
        title: 'Feature Request',
      ),
      Label(
        id: 'lbl-2r98yas4',
        title: 'Payment',
      ),
    ],
  ),
);
Once you add the feedback options, you should see them after the message step.
INFO
Note that you also need to set a title for your label since we do not pull the name from the Console. For example, you could create a label named 'Bug Customer' in the Console and call it 'Bug' in your app. This is also helpful when localizing your app.
Localize labels
Localizing labels can be achieved by placing Wiredash below MaterialApp or by using a third-party localization package. If these options do not work for you, you can add the labels directly when calling Wiredash.of(context).show(), where you have access to a valid BuildContext.
Wiredash.of(context).show(
  inheritMaterialTheme: true,
  feedbackOptions: WiredashFeedbackOptions(
    email: EmailPrompt.optional,
    screenshot: ScreenshotPrompt.optional,
    labels: [
      Label(
        id: 'label-a',
        title: AppLocalizations.of(context)?.labelA ?? "Fallback for Label A",
      ),
      Label(
        id: 'label-b',
        title: AppLocalizations.of(context)?.labelB ?? "Fallback for Label B",
      ),
    ],
  ),
);
Attach hidden labels
You can mark your labels as hidden so they won't show up for your users. This is useful for automation, allowing you to forward feedback to the right people.
You can add hidden labels either in the Wiredash widget or when calling Wiredash.of(context).show().
Wiredash.of(context).show(
  feedbackOptions: WiredashFeedbackOptions(
    labels: [
      Label(
        id: 'lbl-24sf23',
        title: 'High Priority',
        hidden: true,
      ),
    ],
  ),
);
WARNING
Setting feedbackOptions in the show() method overrides the feedbackOptions set in the Wiredash widget.